LinearLayoutクラスは、ViewGroupクラスを継承したものであり、子ビューを水平、あるいは、垂直に一直線に並べるものです。
LinearLayoutの使い過ぎには気をつけないといけません。
複数のLinearLayoutをネスト構造にしようとする場合、RelativeLayoutを利用するのが良い場合が多いです。
LinearLayoutの使い方サンプル
「HelloLinearLayout」という名前のAndroidプロジェクトを作成します。
「res/layout/main.xml」ファイルを開き、以下のように修正します。
Javaソースを開き、以下のようにonCreate()メソッドでレイアウトファイル(res/layout/main.xml)がロードされるように修正します。(Eclipseで自動生成されたJavaソースは既にそのようになっています。)
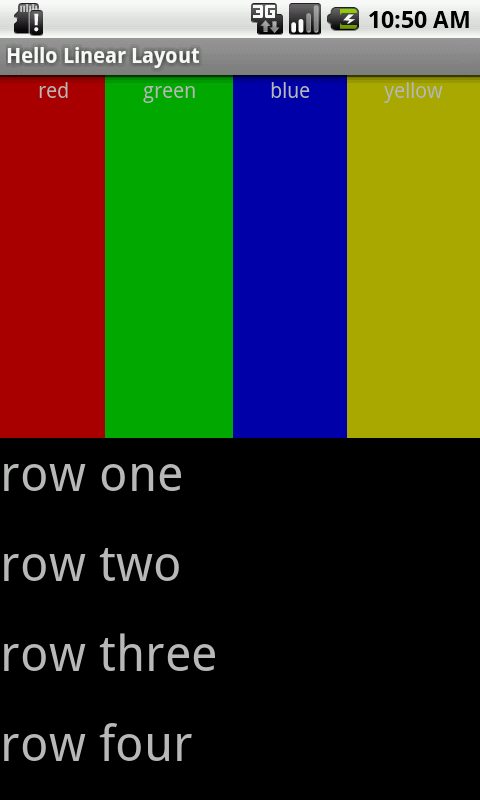
Androidアプリケーションを実行してみましょう。
<?xml version="1.0" encoding="utf-8"?><LinearLayout xmlns:android="http://schemas.android.com/apk/res/android"
android:orientation="vertical"
android:layout_width="fill_parent"
android:layout_height="fill_parent"><LinearLayout
android:orientation="horizontal"
android:layout_width="fill_parent"
android:layout_height="fill_parent"
android:layout_weight="1">
<TextView
android:text="red"
android:gravity="center_horizontal"
android:background="#aa0000"
android:layout_width="wrap_content"
android:layout_height="fill_parent"
android:layout_weight="1"/>
<TextView
android:text="green"
android:gravity="center_horizontal"
android:background="#00aa00"
android:layout_width="wrap_content"
android:layout_height="fill_parent"
android:layout_weight="1"/>
<TextView
android:text="blue"
android:gravity="center_horizontal"
android:background="#0000aa"
android:layout_width="wrap_content"
android:layout_height="fill_parent"
android:layout_weight="1"/>
<TextView
android:text="yellow"
android:gravity="center_horizontal"
android:background="#aaaa00"
android:layout_width="wrap_content"
android:layout_height="fill_parent"
android:layout_weight="1"/>
</LinearLayout>
<LinearLayout
android:orientation="vertical"
android:layout_width="fill_parent"
android:layout_height="fill_parent"
android:layout_weight="1">
<TextView
android:text="row one"
android:textSize="15pt"
android:layout_width="fill_parent"
android:layout_height="wrap_content"
android:layout_weight="1"/>
<TextView
android:text="row two"
android:textSize="15pt"
android:layout_width="fill_parent"
android:layout_height="wrap_content"
android:layout_weight="1"/>
<TextView
android:text="row three"
android:textSize="15pt"
android:layout_width="fill_parent"
android:layout_height="wrap_content"
android:layout_weight="1"/>
<TextView
android:text="row four"
android:textSize="15pt"
android:layout_width="fill_parent"
android:layout_height="wrap_content"
android:layout_weight="1"/>
</LinearLayout></LinearLayout>
上記のXMLファイルを見てみましょう。
ルートレベルのLinearLayoutが「orientation」を「vertical」に指定しています。
これで、子ビュー(この場合は2つの子ビュー)は、垂直方向に並びます。
1つ目の子ビューでは、さらにLinearLayoutが定義されており、「orientation」は「horizontal」に指定しています。
2つ目の子ビューでも、さらにLinearLayoutが定義されており、「orientation」は「vertical」に指定しています。
入れ子になった2つの子ビューのLinearLayoutは、いくつかのTextViewを要素として保持しており、子ビューのLinearLayoutで指定されたように一直線に並びます。
public void onCreate(Bundle savedInstanceState) {    super.onCreate(savedInstanceState);
    setContentView(R.layout.main);
}
setContentView(int)メソッドは、Activityクラスで指定されたIDのレイアウトファイルを読み込みます。
「R.layout.main」を指定すると、リソースファイルの「res/layout/main.xml」が指定されることになります。
以下のように表示されれば成功です。